
An intro to archiving and compression in Linux
It's often useful to make copies of things an move large collections of files from place to place.
Let's take a look at a few commands
gzip
bzip2
tar
Compressing Files
Data compression is the process of removing redundancy from data, done with a compression algorithm. These algorithms fall into two categories:
- Lossless: Preserves all the data contained in the original.
- Lossy: Removes data as the compressions is performed to allow more compression to be applied. When the file is restored, it does not match the original version, it's a close approximation. JPEG and MP3 are examples of lossy compression.
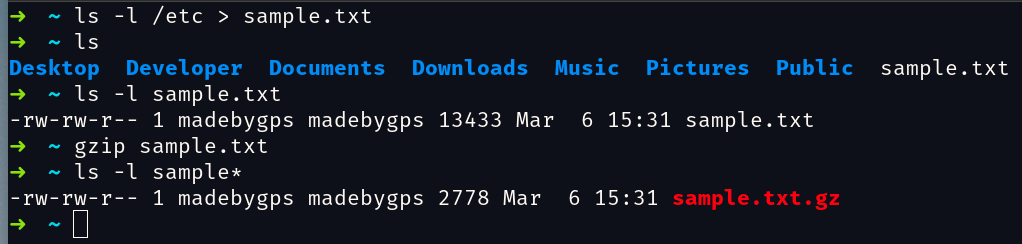
The gzip command
This command is used to compress one or more files. It replaces the original file with a compressed version.
The syntax of the command is gzip file
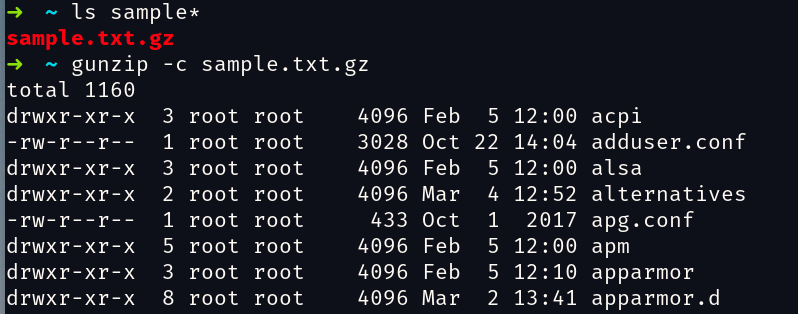
We can use gunzip to uncompress

gzip has many options, check man gzip for a full listing.
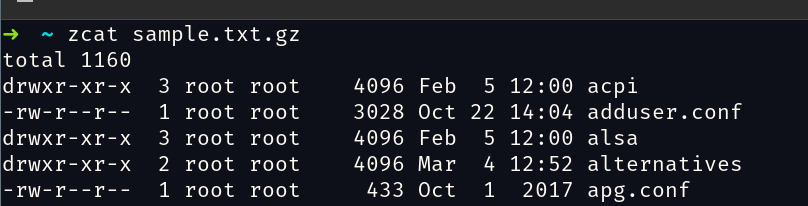
If we wanted to view the contents of a compressed text file, we could use the gunzip -c or zcat
The bzip2 command
This command is similar to gzip but uses a different compression algorithm and achieves higher levels of compression at the cost of compression speed.
Use to compress:
bzip2 sample.txtUse to uncompress:
bunzip2 sample.txt.bz2bzip2 also has several supported options.
Archiving Files
Archiving is the process of gathering up many files and bundling them together into a single large file.
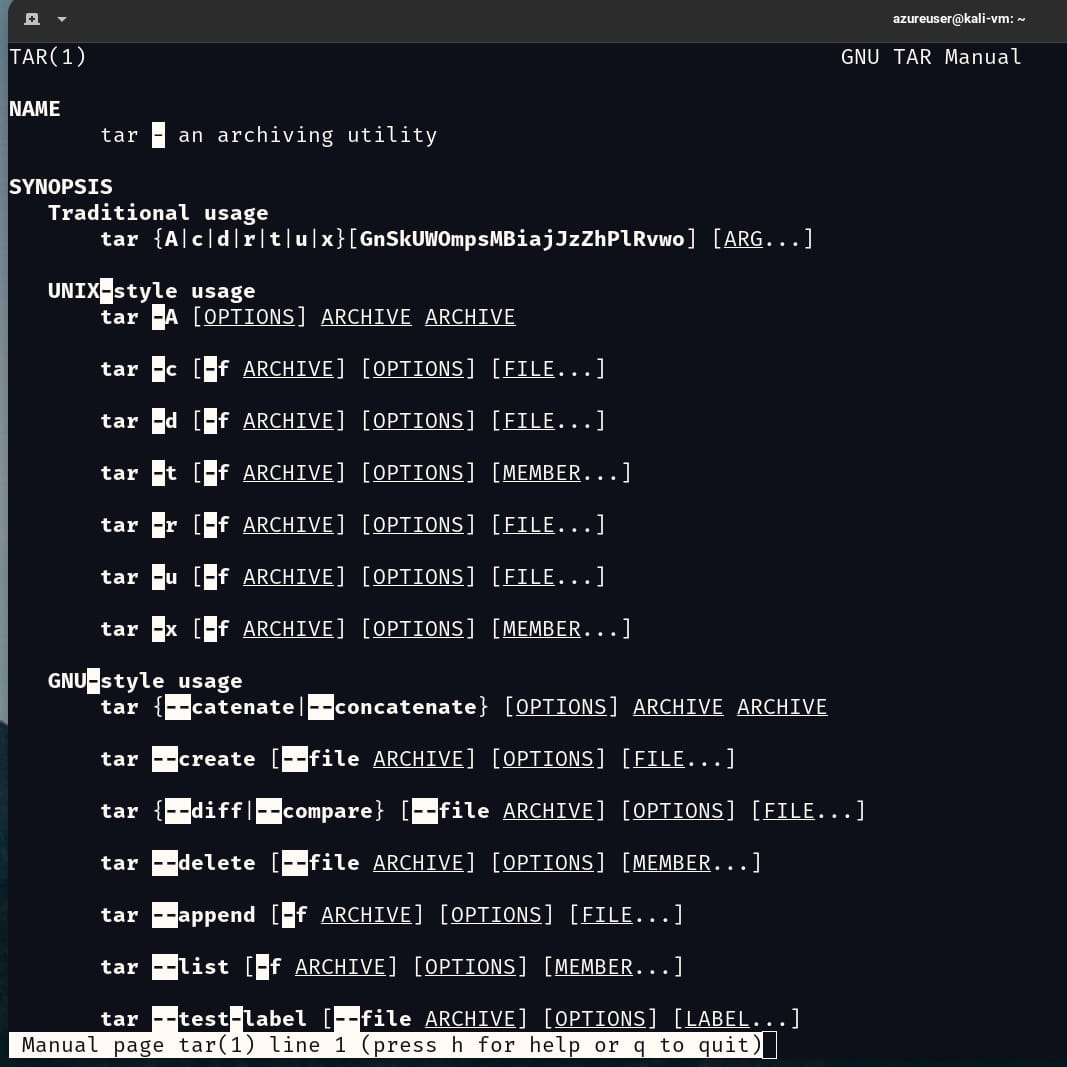
The tar command
The tar program is a classic tool for archiving files. If you seem a filename with the .tar extension, it indicates a plain tar archive and if it ends with .tgz it indicates a gzipped archive.
tar has a few modes and keep in mind that the mode must always be specified first.
| Mode | Description |
|---|---|
| c | Create an archive from a list of files and/or directories. |
| x | Extract an archive. |
| r | Append specified pathnames to the end of an archive. |
| t | List the contents of an archive. |
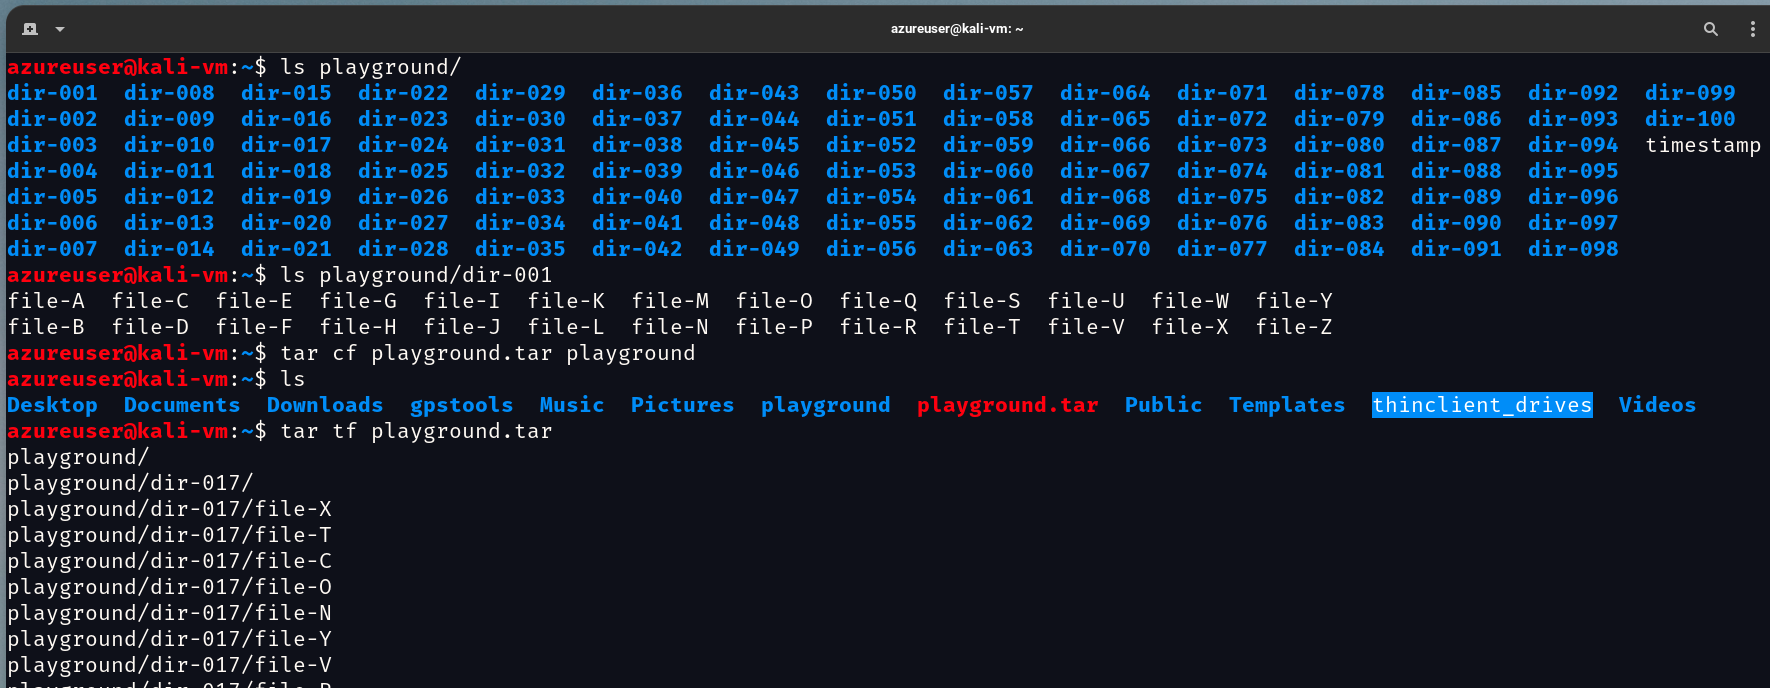
I've created several folders and files, I can archive them with tar cf playground.tar playground
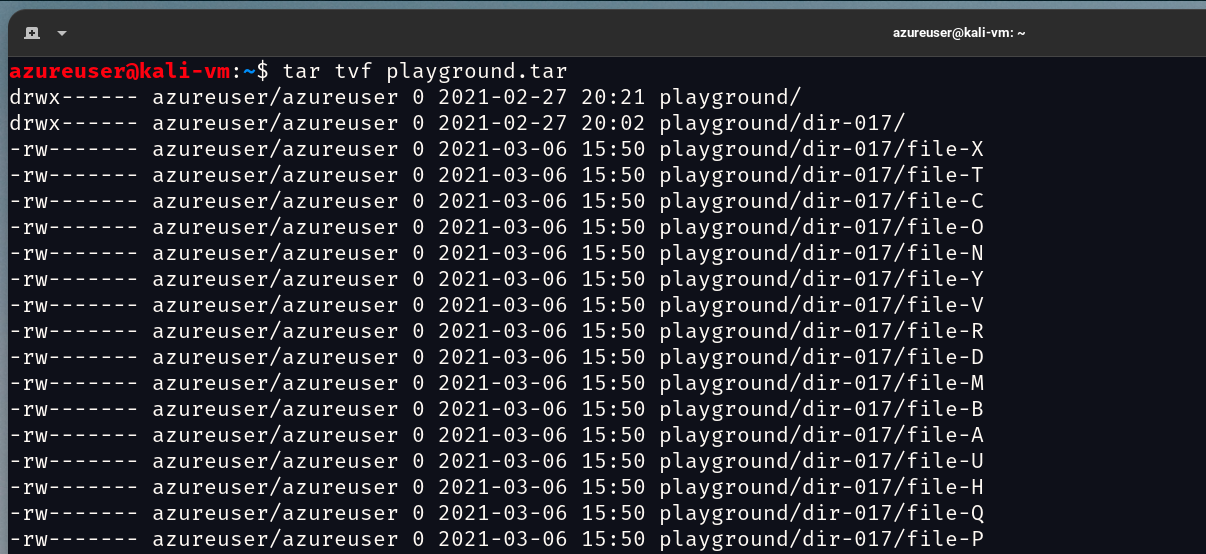
We can use the v option (verbose) for a more detailed listing
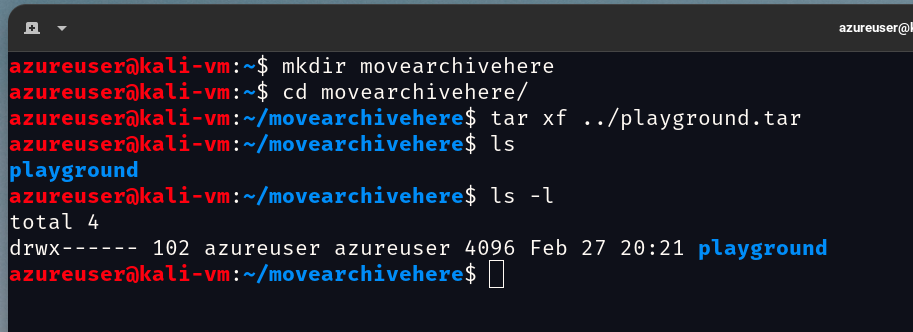
We can extract the tar in a new location. Keep in mind that unless we are operating as the superuser, files and directories extracted from archives take on the ownership of the user performing the restoration, rather than the original owner.
tar uses relative path names instead of absolute by default. This is useful because it allows us to extract archives to any location rather than having to extract them to their original locations.
You can limit what is extracted from the archive by adding the trailing pathname to the tar command and tar will only restore that specified file. You can also specify multiple path names. Wildcards are not normally supported, but the GUN version of tar does support them with the --wildcards option
tar xf ../playground2.tar --wildcards 'home/azureuser/playground/dir-*/file-A'
Modern versions of GNU tar support both gzip and bzip2 compression directly with the use of the z and j options, respectively.

The -T is short for the --files-from option and it indicates to tar where to read its list of path names from, previously we told tar the directory or file to use but now we are using the - option and this let's tar know to use standard input or output as the files to extract or archive. The -T option is a little confusing to grasp at first. What this command is saying:
find playground/ -name 'file-Afind all files in playground that match file-A|pipe what you found totartar czf playgroundcreate agzipcompressed tar named playground.tgz-T -with the files from standard output, which are coming from the pipedfindcommand standard output.